To add the finishing touches we'll position materials using the various mapping tools.
| 01 Turn off the background images in all the viewports. Launch the Material editor by pressing [M] on the keyboard and click New. Change the name of this new material to black, change the Diffuse colour swatch to R:12, G:16, B:8. In the Ambient tab clear the Match Diffuse checkbox and, with the three propellers and the housing selected, click Apply. | 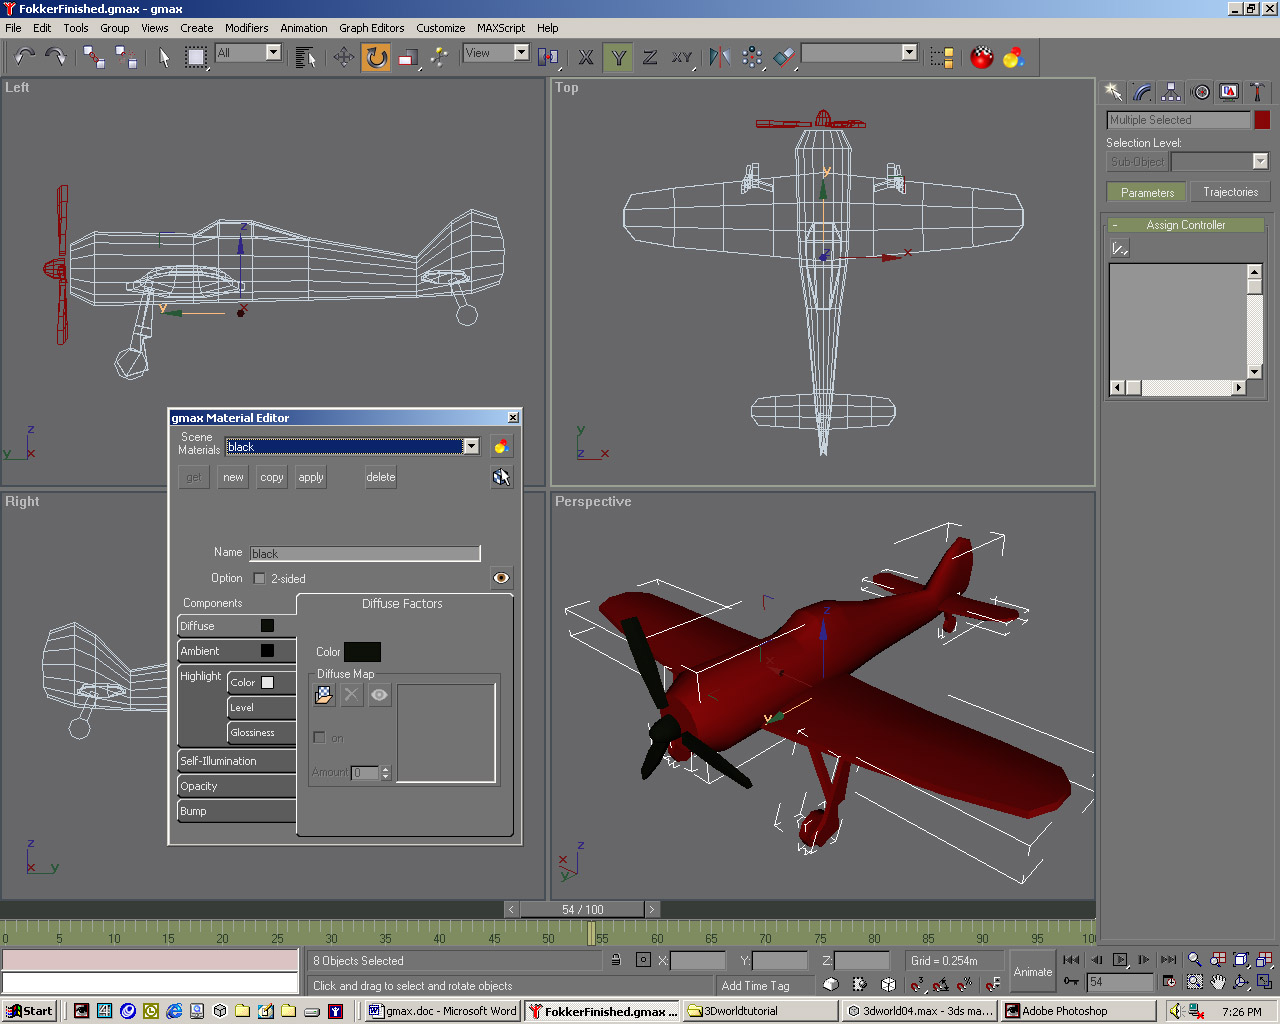 |
| 02 With the wings selected, apply a planar UVW Mapping ie modifier, hitting Fit and selecting the right axis to size the modifier across the wings. In a new material called wings click the Assign Texture button in the Diffuse tab and pick WingsDiffuse.jpg. Select WingsBump.jpg for the texture in the Bump tab. Apply this material to the current selection. | 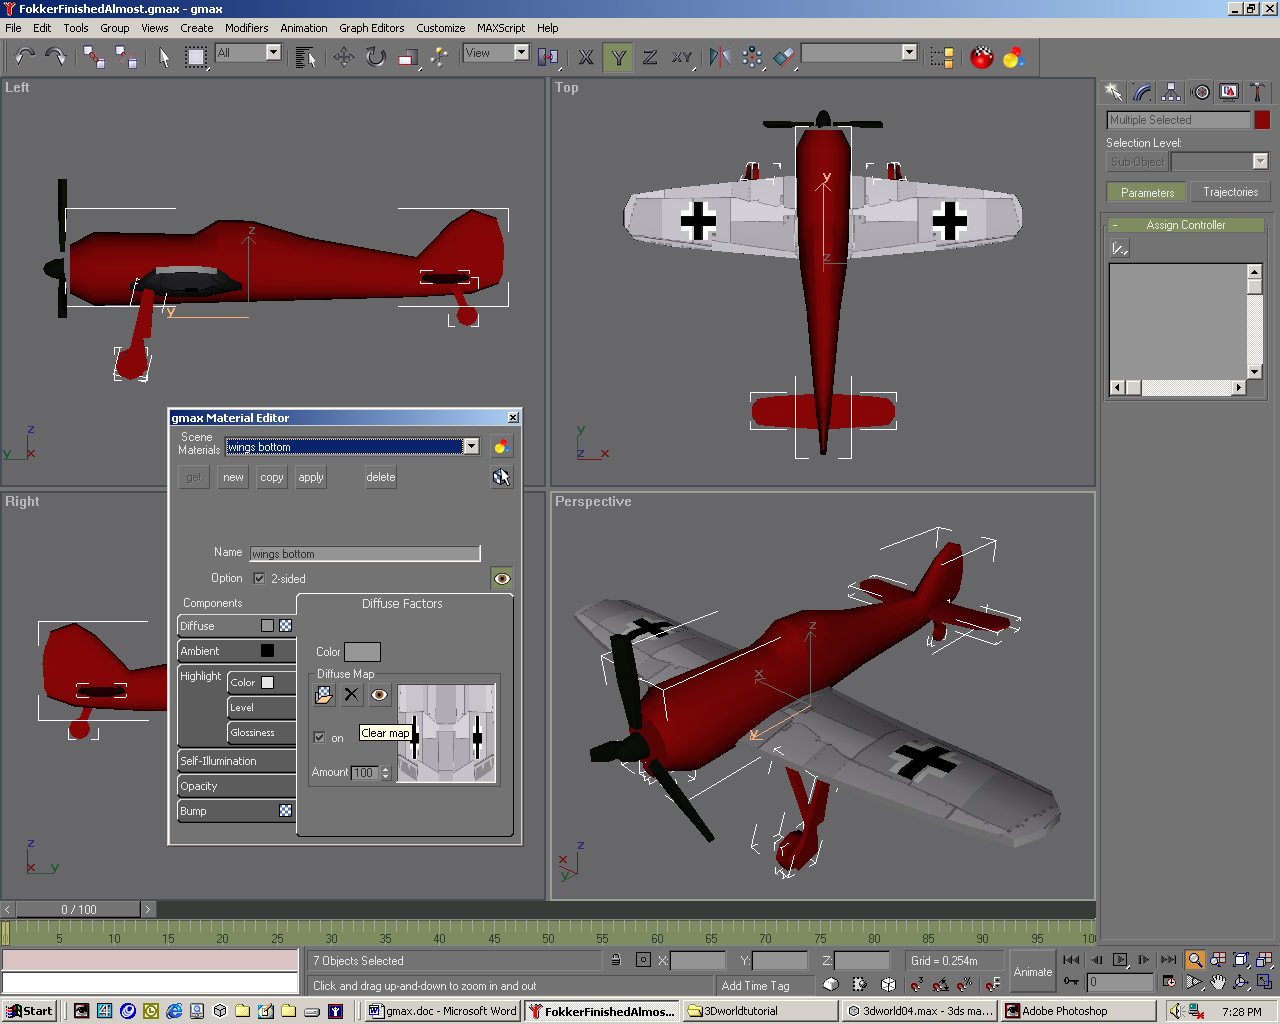 |
| 03 Select the fuselage and add another UVW Mapping a modifier, acting along the plane's length at the sides. Name a new material fuselage-sides. In the Diffuse tab pick FuselageDiffuse.jpg. Put FuselageBump into the Bump channel. Check the 2-Sided checkbox and apply this to the fuselage. In Polygon Sub-Object mode select the nose end and the tail end. | 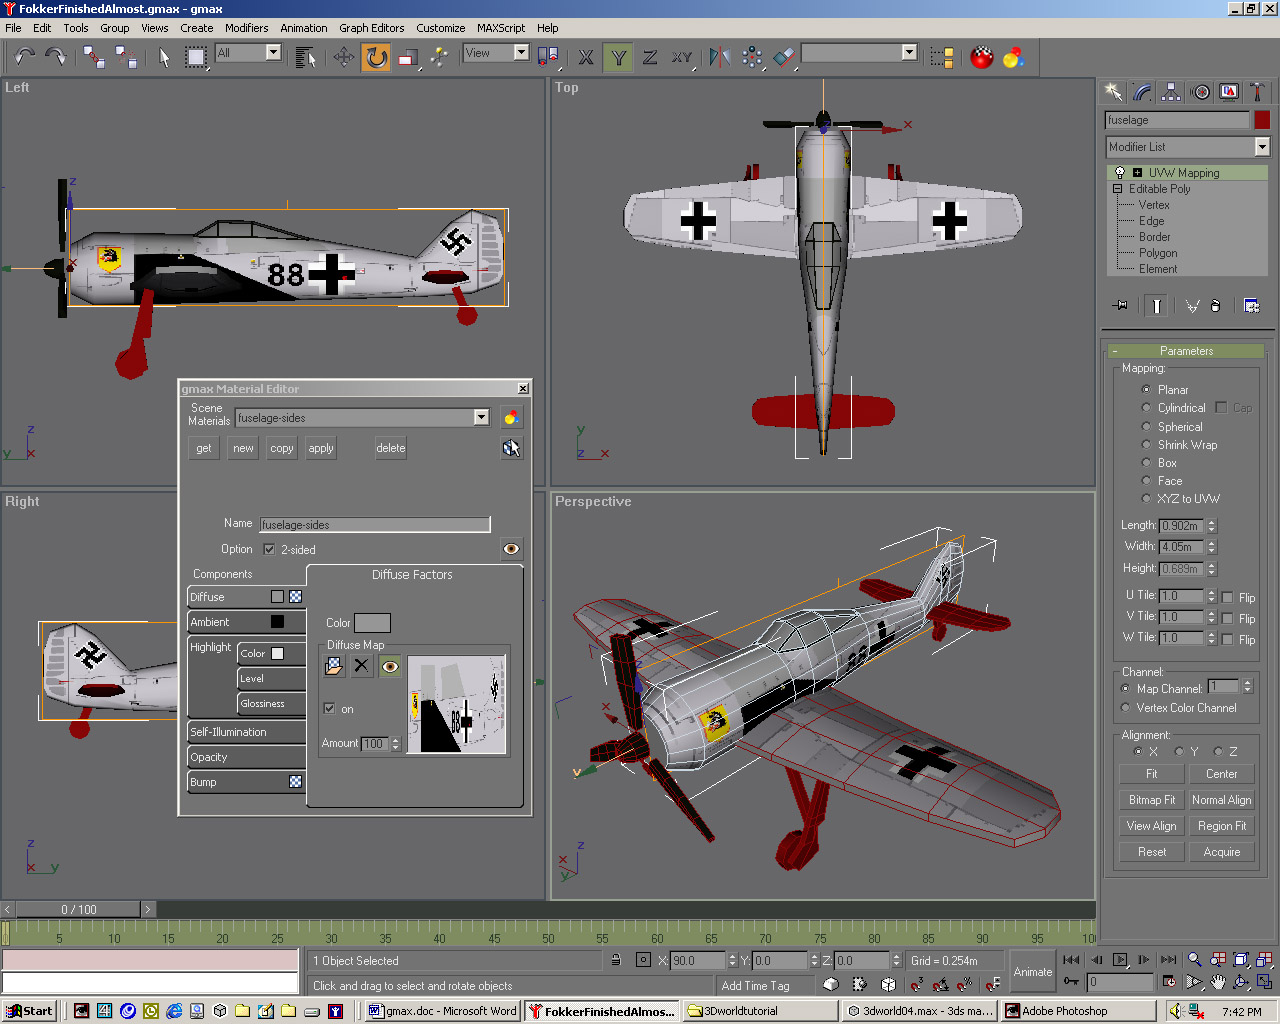 |
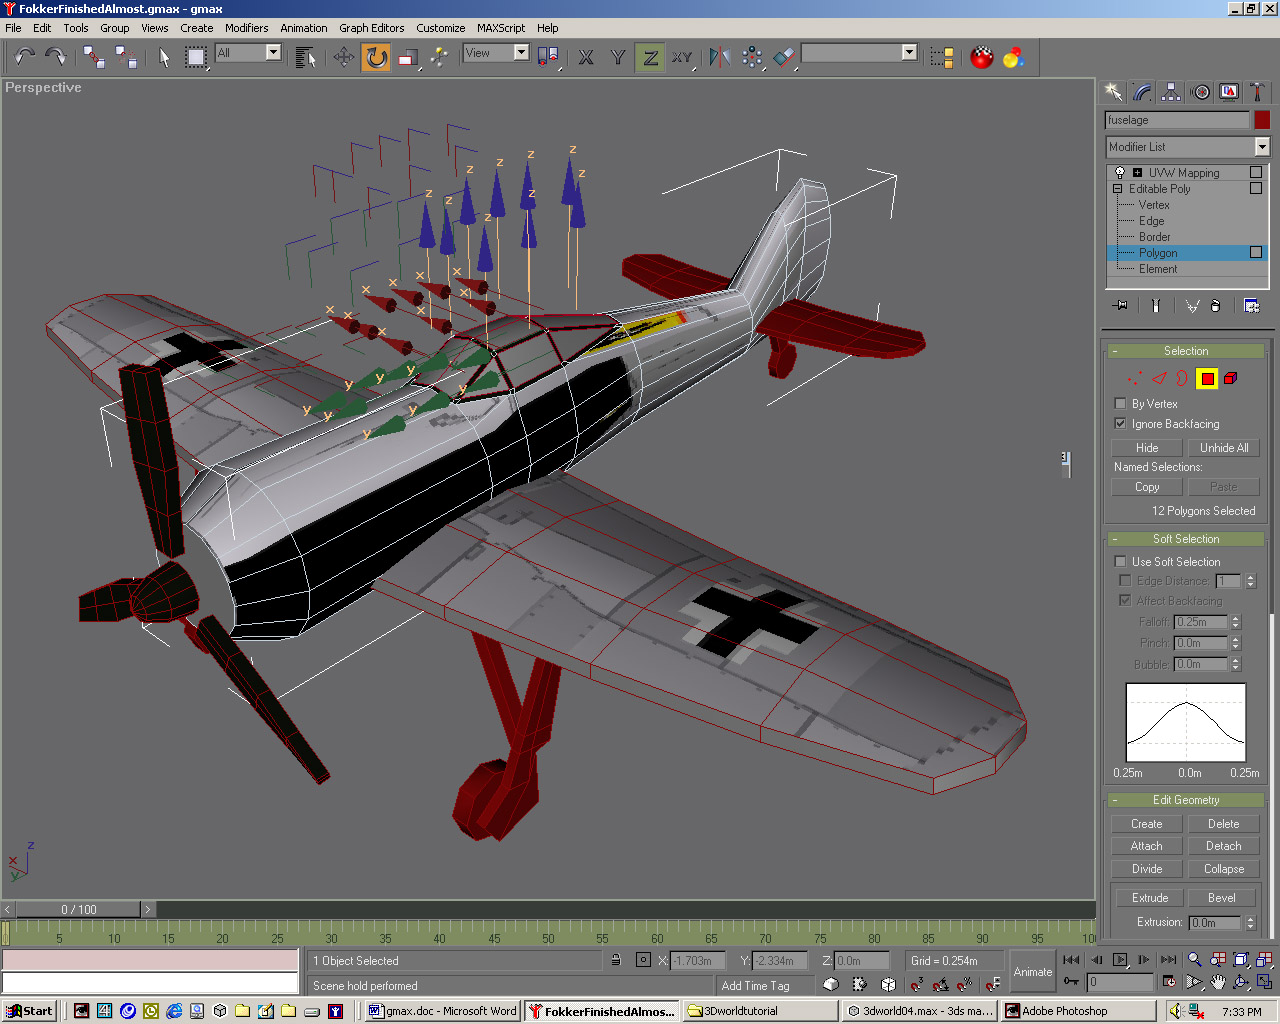
| 04 With these two polygons selected, make another material called fuselage-plain, making the Diffuse colour mid-grey of about 150,150,150, the Ambient colour 0,0,0 and the Highlight colour 229, 229, 229. Select the polygons that make up the cockpit windscreen frame. Apply the existing black material to it. Select the polygons that make up the glass windscreen panels.
|
 |
| 05 Create another new material called glass with a Diffuse 9 colour of 13,50,1, an Ambient colour of 0,0,0 and change the Opacity spinner to 40. Hit Apply and click the UVW Mapping modifier to go back to the top of the Modifier Stack. The fuselage should now appear textured correctly, because gmax has converted these individual materials into one Multi-Material. |  |
| 06 Name this top-level material fuselage. Apply your fuselage-plain material to the wheel supports and the black material to the three wheel objects. Now select the polygons that make up the support for the back wheel and apply the fuselage-plain material to these, thus creating another Multi-Material, which you should rename wheel-back. | 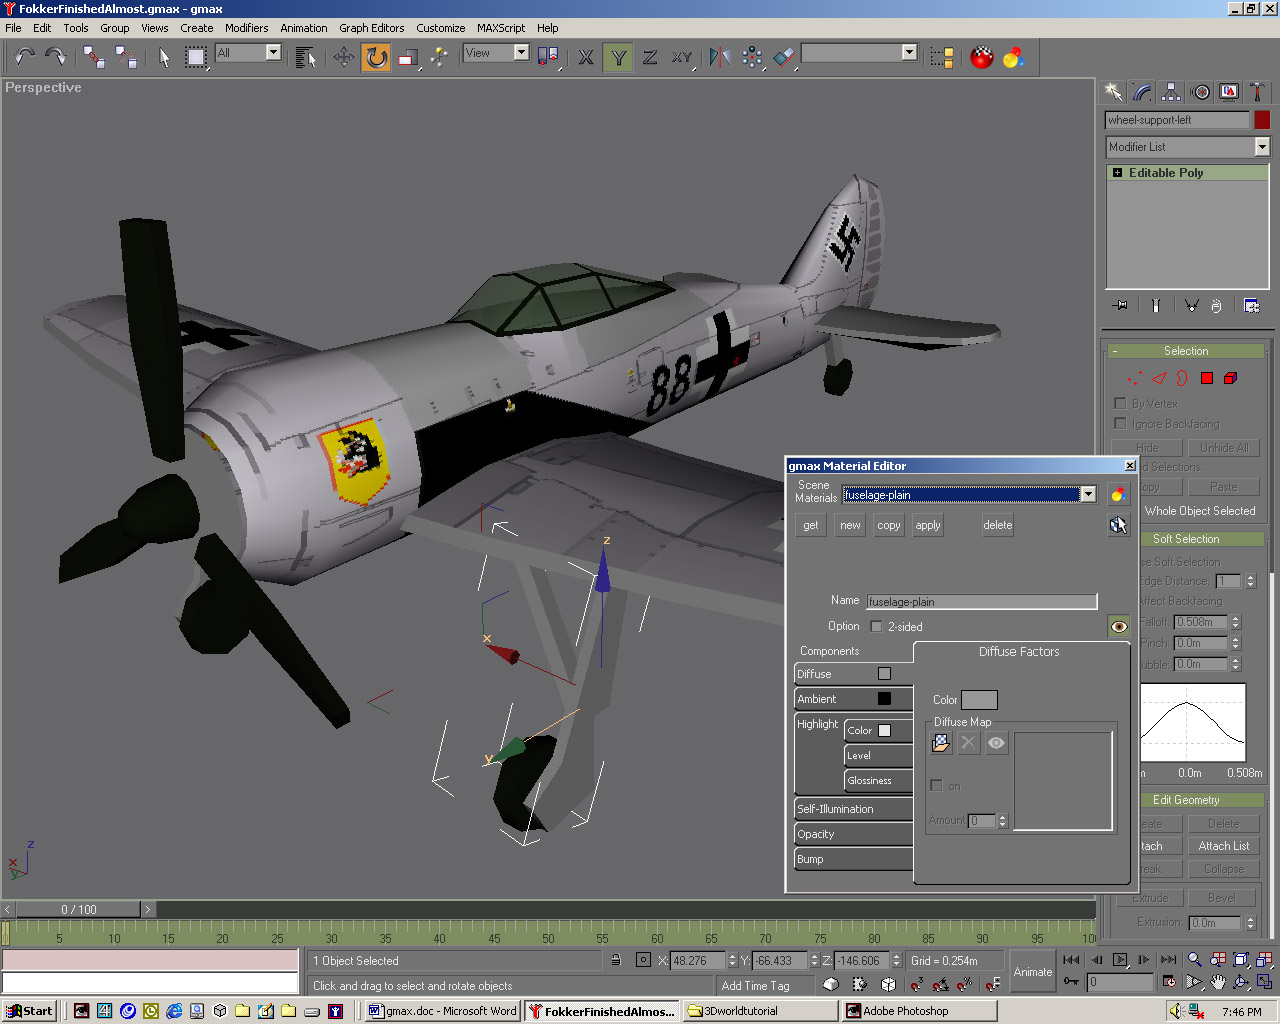 |
| 07 Apply a planar UVW Mapping modifier to the tail so that it fits along its flat surface. In a new material renamed tail specify TailDiffuse.jpg in the Diffuse tab and TailBump.jpg in the Rump tab. First apply this to the tail object, then in Polygon Sub-Object mode select all the polygons that make up the thin edge of the tail, applying the fuselage-plain material to just this selection. | 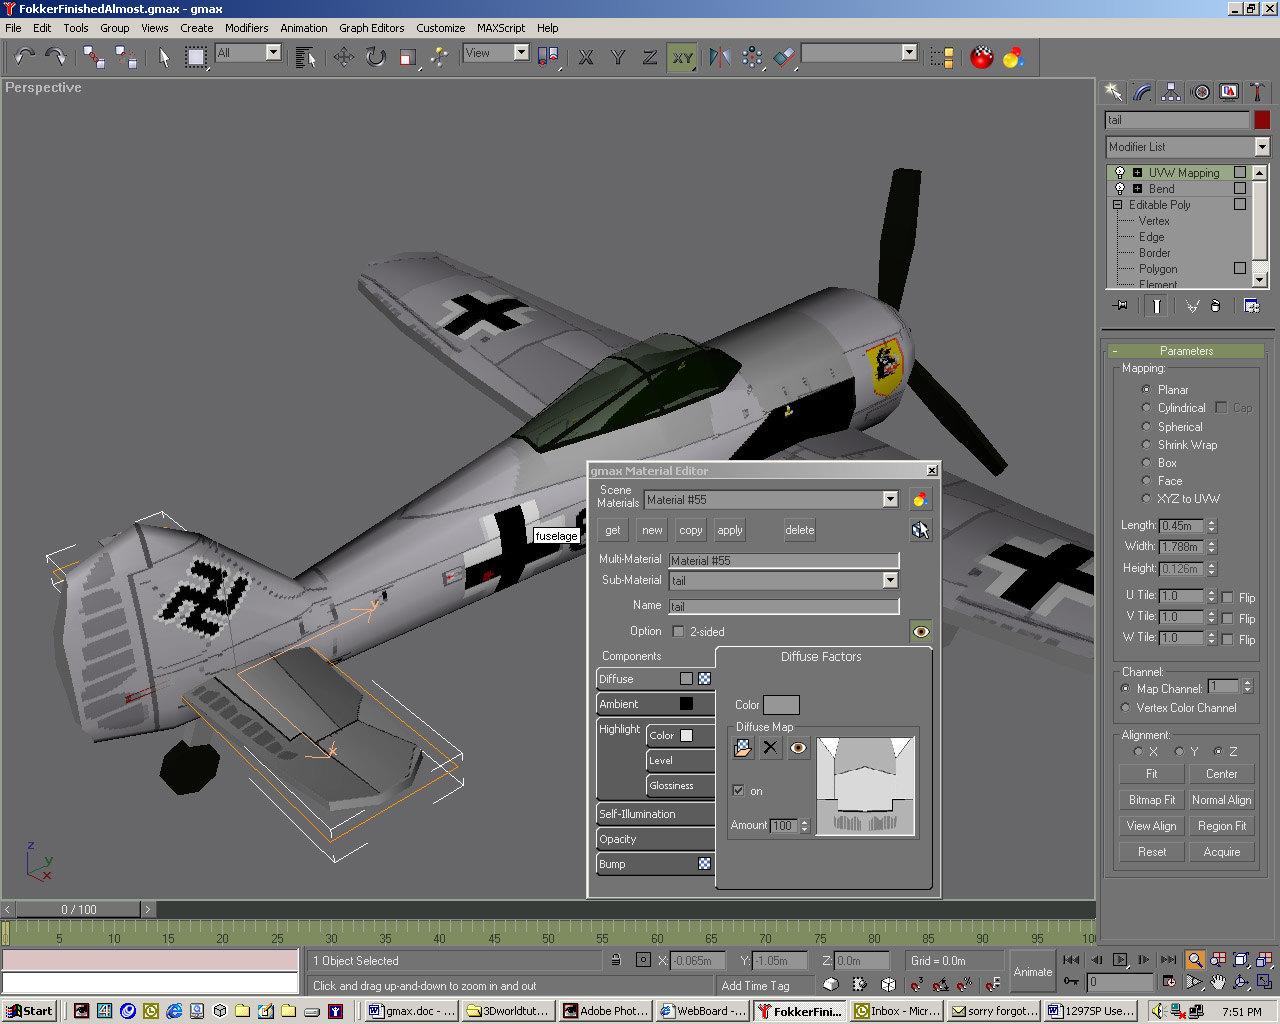 |
| 08 Repeat for the wings, applying the fuselage-main material to its outer edge. You now need to parent the wheels to their supports and these supports to the wings. Then the wings, tail and propeller-housing should be parented to the fuselage. Now collapse the stack for each object: right-click the topmost modifier in each instance and select Collapse To. |  |
| 09 Select propeller-housing, hit Animate, go to frame 100 and right-click the Rotate button, entering 3,600 degrees around the relevant axis. In the Motion panel under Assign Controller highlight the Rotation controller, click the Assign Controller icon above, pick Euler XYZ. Right-click the keys in the timeline and change their in and outs to Linear. Hit Play. | 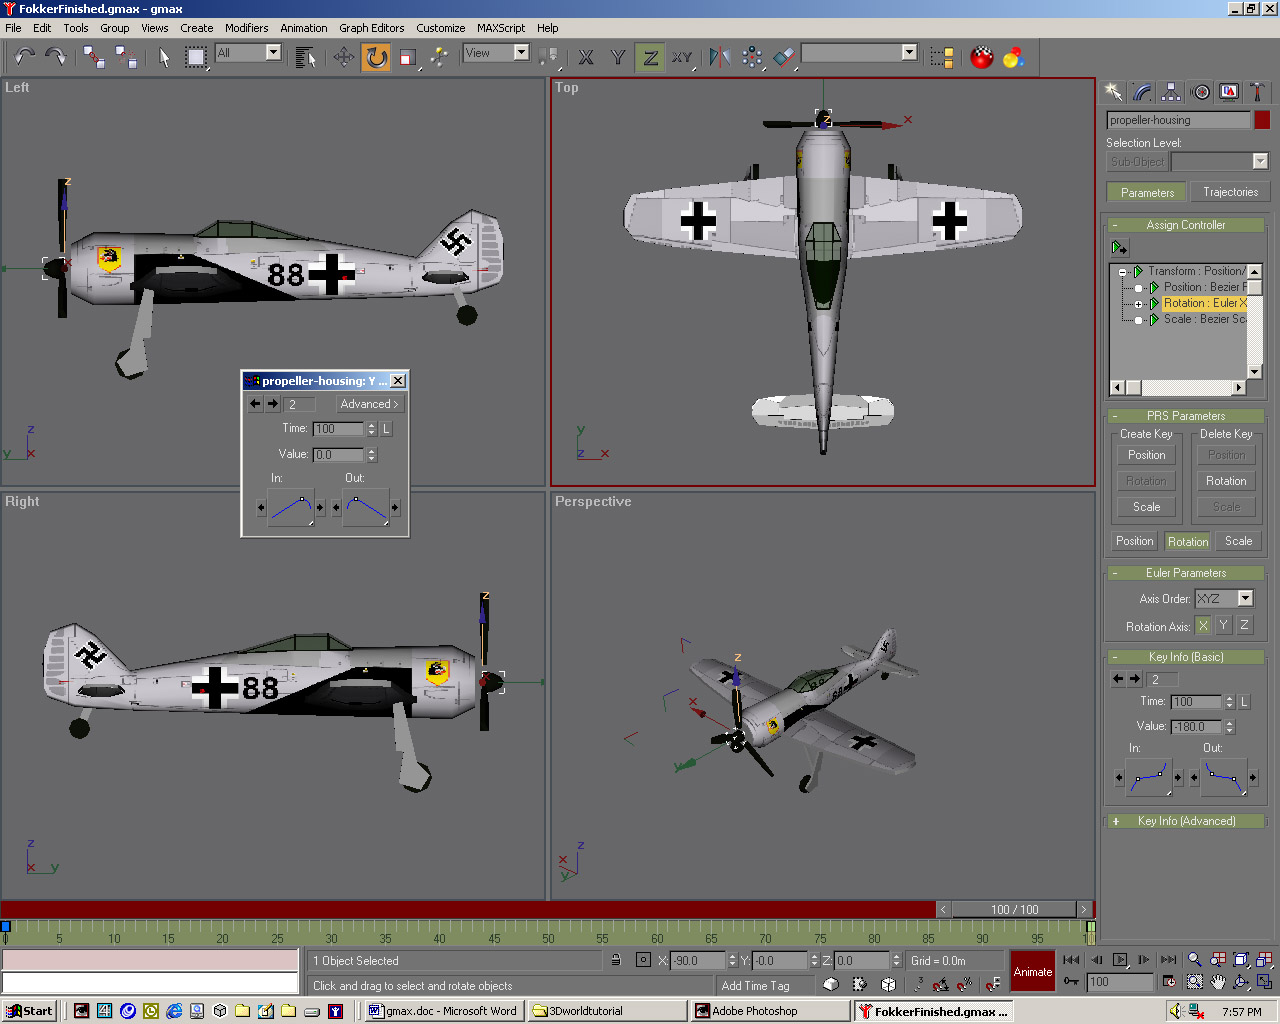 |